

How To Add Pictures Over Video In Windows Movie Maker
There are many reasons why you would want to overlay a picture on a video. You may want to create a motion picture-in-picture upshot or overlay an image such as a logo or other graphics. You may too want to utilize images every bit function of your video project and add effects or even a voice-over to the video. All of this is possible with the professional Movavi Video Editor Plus every bit well as a few other applications, some of which are even free to download and apply.
In this guide, nosotros're exploring the different methods and video editing software to allow you to add your own epitome over a video format.
Way #1 – How to add a picture to a video with Movavi Video Editor Plus
The instructions beneath will tell you how to overlay a flick on a video using Movavi's video editor. This powerful app will help you lot not only put a picture into a video, merely too edit your video clips in many other ways: cut and join, add funny stickers, utilize creative filters, and more than.
You lot can easily insert media objects into your project to make your movies more interesting and engaging. Take a look at the instructions below to learn how to add a picture to a video.
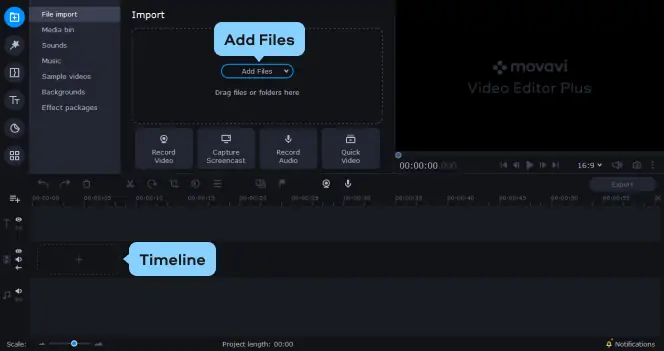
Step 1. Install Movavi Video Editor Plus
Commencement of all, download the distribution file and install the software. As soon as the installation process is completed, open up the program.
Footstep ii. Add your video
Now it'due south time to add a video prune. Click the Add Files button and cull the video on which yous want to overlay a movie. Elevate and drop your file from the Media Bin to the Timeline.
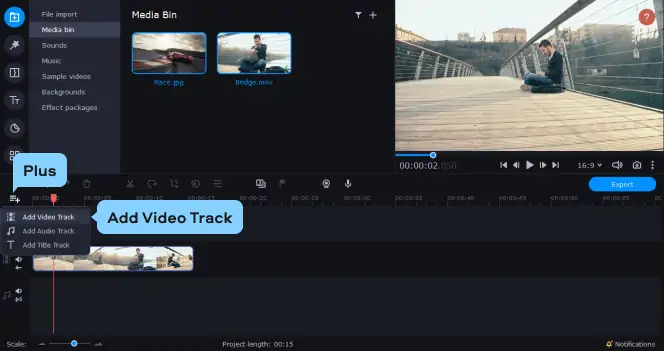
Step 3. Add together a photograph to a video
To add an epitome to the video, you need to add information technology to your project first. Click the Plus button and choose the Add Video Track option in the drib-down carte. Then drag-and-drib your picture to the new rail from the folder in which information technology'due south located. You tin can add more than one image if yous need to. If you desire to add a logo over the video, make sure the image has a transparent background and is saved as a PNG file.
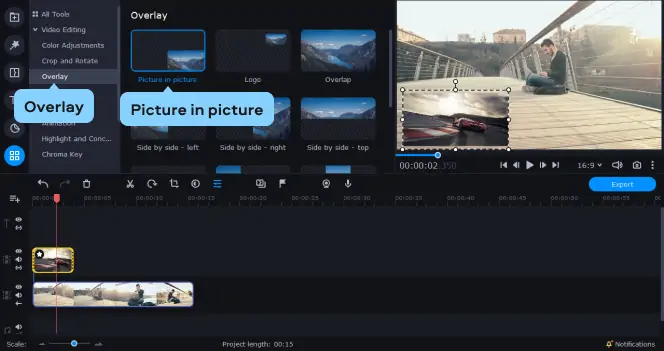
Footstep four. Edit the moving picture layer
Adjust the overlay settings. Select the desired overlay mode (Picture in picture show, Logo, Overlap, Side by side, or Trio). Side by side, adjust the angle value, picture size, and location in the preview section.
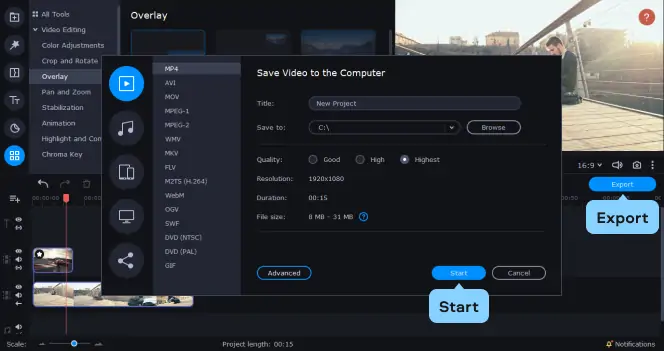
Step 5. Save the edited video
At present you know how to put a photo on a video, you've done it yourself, and all you need at present is to salve the edited file. Click the Export push button, select the desired video format, destination folder, quality, and new file name if needed. You lot can also define additional video and sound settings. And so click the Beginning button. Once the export is consummate, the folder containing your video volition open up automatically. Now you know how to insert a film into a video using Movavi Video Editor Plus.
Style #2 – How to put a picture on a video in iMovie
iMovie is free software for iOS and macOS. Information technology comes automatically installed on your Apple device and does a similar task to Windows Picture show Maker.
Although iMovie is considered entry-level software, it is capable of inserting a picture over a video and creating a "pic-in-motion picture" effect. There are fifty-fifty some options for doing some bones blitheness of the overlaid image as you superimpose it.
iMovie comes with a media library and a variety of features allowing you to add your own titles, transitions, and furnishings. It's perfect for domicile videos and for simple YouTube projects.
Hither'due south how to add a picture on a video in iMovie:
Footstep i. Create a new project in iMovie
Open up upwards the iMovie app from Finder or Launchpad and create a new project.
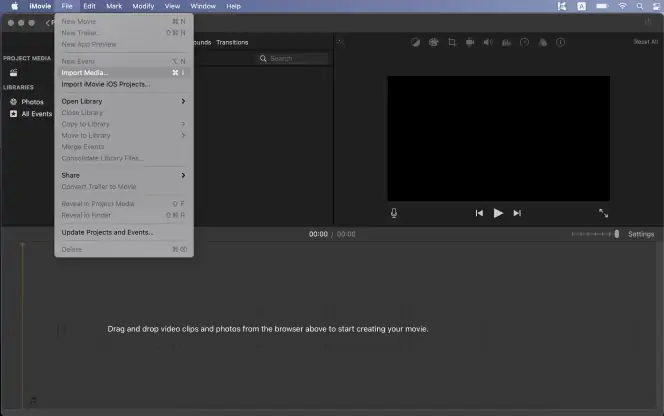
Footstep ii. Upload your files
Click on File and and so Import Media and locate the video and picture that you lot plan to use and import them to the project.
Stride 3. Position the files on the timeline
Select a clip or range of a prune that you desire to utilize as the footing for your picture-in-moving-picture show, and drag it in a higher place a clip in the timeline.
Drag the epitome until it shows the light-green Add icon (+), and release the mouse button.
Step four. Specify the settings
Click the pop-upwards menu on the left and choose Picture in Picture. This will bring upward more controls for how to combine the images together.
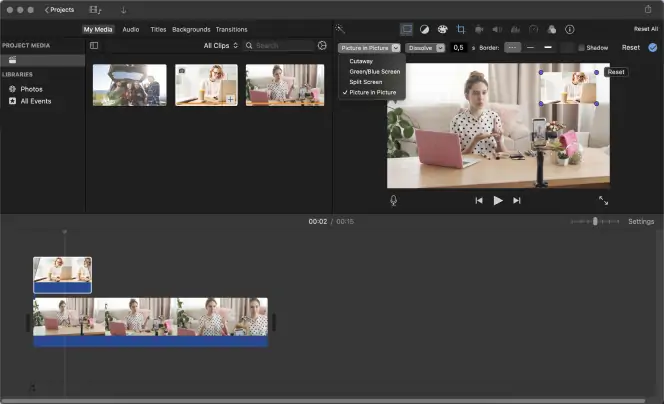
Pace 5. Movement the picture on the timeline
Click and elevate the prototype to the part of the screen where you desire information technology to display. Y'all will also see transition effects and border settings that you can modify, adding a different expect to the video.
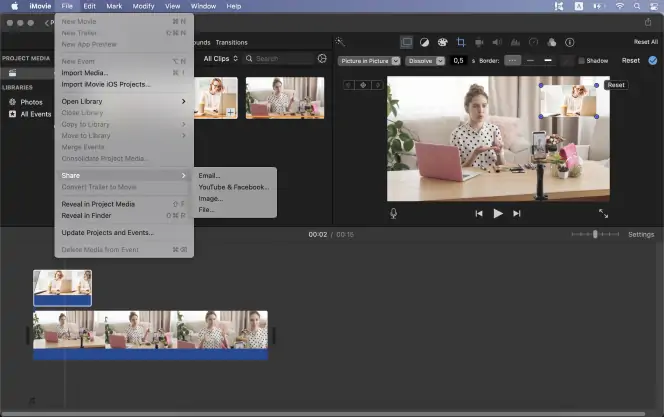
Stride 6. Share the file
Share the video. Click on File and then Share to bring up a variety of options for sharing your newly edited video. You can choose to upload directly to Vimeo or YouTube, attach to electronic mail or just download to a file on your computer.
Way #3 – How to insert a motion picture into a video with Windows Movie Maker
Windows Picture show Maker is a piece of software installed on many Windows devices and while support is not offered for it anymore, information technology can however be used by people who have the software on their machines to insert a picture in a video.
Windows Film Maker has the benefit of a really unproblematic interface that doesn't take long to get to grips with even as an amateur or beginner. Windows Motion-picture show Maker is installed by default as function of the media suite on Windows computers. On the most contempo Windows devices, the free Film Maker software has been replaced by the Microsoft Photos App included in Windows 10, which includes a Video Editor mode.
Windows Movie Maker doesn't really permit y'all to superimpose an image on summit of a video, nor tin you consign your clip to MP4 with information technology. Still, you can insert an paradigm in a video and add together transitions. Here'southward a footstep-by-pace guide to inserting a picture show into a video using Windows Picture show Maker:
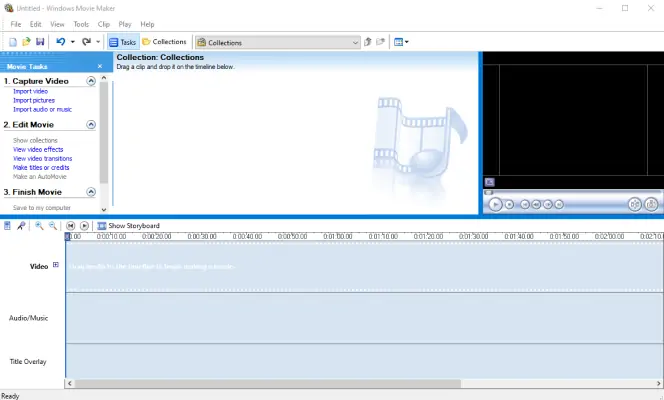
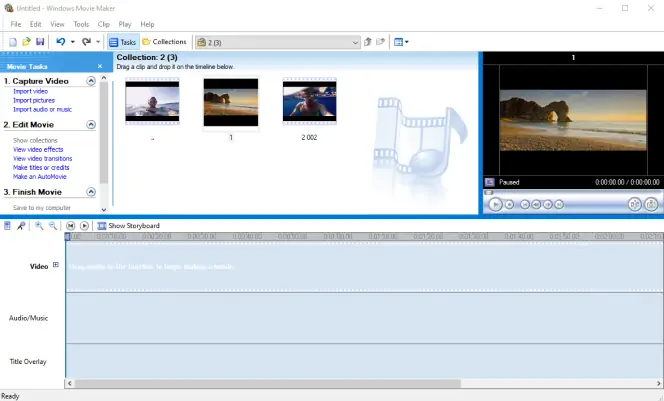
Footstep 1. Add together your media files
Open Windows Movie Maker and click Import Video to locate the video file. Ten click Import Pictures to separately locate and paste the image file into the project from your difficult bulldoze.
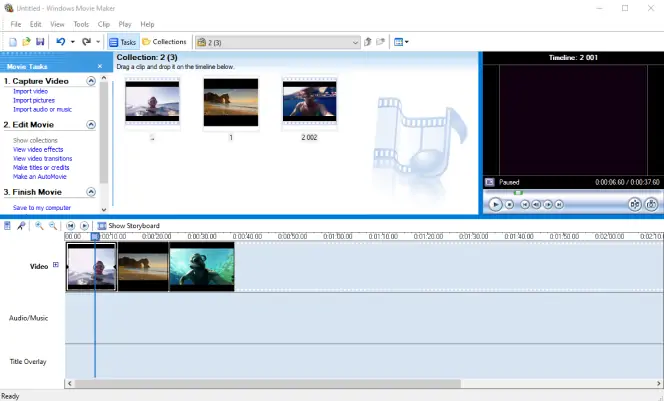
Step two. Motion your files to the timeline
Select the items you want to apply and drag them onto the Timeline at the bottom of the screen, this is where y'all start to structure the video projection.
Step three. Insert a picture
Choose where y'all want to insert your picture and split the video clip in two. To do this, click the Carve up button in the preview window. Drag the flick on the Timeline so that it'due south in the correct place. Click View video transitions to add together effects in between the clips.
Step 4. Adjust the sound track
In case your video contains audio, 1 extra step should exist made. First, consign the sound track separately and delete information technology from the Timeline. And then split the video into 2 and adjust the duration of the playback for each particular and then that the total duration is the same as before. Next, insert the saved audio track again and make sure the audio is in sync with the video.
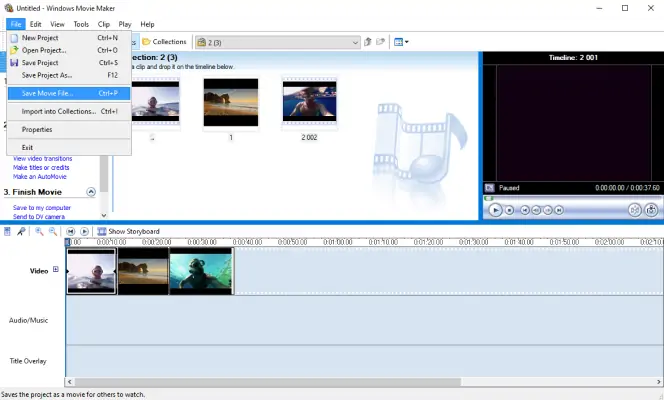
Pace 5. Salvage the video
Open File and click Save Movie File. Select the My Computer option. Click Next, enter a file name and browse for the appropriate destination binder. Click Side by side again and select the best quality for playback as recommended. Click Next one more time to export the prune. That's how to put a pic on a video using Windows Movie Maker.


Movavi Video Editor Plus
Make videos. Create. Inspire.
Frequently asked questions
How tin can I add a logo to my video?
To add a logo to your video, you'll demand to use a desktop or an online video editing plan. If you prefer using a desktop app, effort Movavi Video Suite.
Download Movavi Video Suite for Windows
Download Movavi Video Suite for Mac
- Install the program and run it on your PC.
- Click New Project in the Edit Video section.
- In the new window that appears, click the Add Files push button. Select your video and your logo in the dialog box. The files will appear in the Media Bin.
- Drag the video and the motion-picture show onto the Timeline.
- Click the Plus push and choose Add Video Track option in the drop-down carte du jour. Movement your picture to the new track.
- In the Overlay window, select the Logo option and position the motion picture on the video.
- Click Export to save the result. In the dialog box, choose the output format, quality, and destination folder. Change the file name if y'all wish. Once you lot're happy, click Start. The resulting file volition open in the specified folder.
How do I overlay a motion-picture show on a video?
Use Movavi Video Editor Plus.
-
Download and install Movavi Video Editor Plus on your PC.
Download Movavi Video Editor Plus for Windows
Download Movavi Video Editor Plus for Mac
- Launch the program and click Add together Files and select the video and moving picture y'all desire to work with. The files volition appear in the Media Bin. Drag and drop them onto the Timeline.
- Select the epitome and elevate it to a position above the Video Track. An Overlay Track will appear.
- By default, the elements are overlaid in Movie-in-picture mode. Double-click on the image to edit it in the preview screen. Here, yous can suit the size of the picture by dragging on the edges and position it on the video. You can too choose Adjacent or Comprehend overlay modes. To do this, open the drop-downwards listing in a higher place the preview screen and select your preferred choice.
- Click the Export push button. Choose the destination folder, video format, and quality. Proper name the file, if you lot wish, and then click Start.
If you also want to learn how to overlay videos, read the detailed guide by following the link beneath.
How can I edit a video and add a picture?
Read this article if you want to learn how to add a moving picture to a video. You can also find detailed information on how to create a video montage in our complete guide.
Source: https://www.movavi.com/support/how-to/how-to-add-picture-to-video.html
Posted by: loftontreave.blogspot.com
0 Response to "How To Add Pictures Over Video In Windows Movie Maker"
Post a Comment